I unvented something. I saw these little stuffed trees on the tables of the wonderful winstub I had lunch in saturday, and it inspired me to try and make them myself.
The first version (red velour) was completely hand-sewn and can't hold up without being propped (you can see the little felt "plug" I made to help it along). For the second I used my machine, and took pictures of the various steps so I could make this quick tutorial. There might be another somewhere else on the web already, in which case it's probably better... but I didn't see it, so I thought making mine would be useful.
For one stuffed tree:
- Gather your fabric (I used a piece of light felt I had lying around, but any fabric would work; red and green / Christmas prints or nature/tree prints would work well) and your tree shape cut out in paper or cardboard. I made mine a little "squat" and wide, because I knew that the final shape of the tree would look thinner and "longer". This explains why the one-dimensional tree you can see on the right behind the others is so wide; it was made with the same basic cut-out.
- cut out 4 tree shapes in fabric, so you have a stack, like so:
- Sew them together two by two, fabrics facings inward; that is to say, make two trees you'll be able to turn inside out, like so (one tree just done sewing, and one already turnd inside out). Don't close the bottom! Make sure to keep a wide "mouth" opened there, and only sew the corner closed before you turn them:
- avoid breaking your needle like I did;
- Now lay one tree on top of the other and line them up well, then sew them together with one central vertical seam, as seen here:
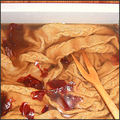
This vertical seam creates four 'pocket' half-trees for later stuffing, which is how the tree will then be able to stand up. Start stuffing your tree with whatever you have - I had these yellow foam bits left over from an old... something or other (can't remember!) and I used it all up with my two trees. Finally! I can buy proper polyfill soon.
Once you're done stuffing the four volumes, sew them closed:
And tada! You have a tree! Or two.
Embellish with sequins or beads, either sewn or pinned like I did (it's quicker and I'm a sloth); use it to suspend your earrings, drape ribbons over... have fun!
Oh, oh, and if you make some, please tell me? I have no doubt that much better looking trees can come out of this; I admit mine are very... beginner-level. Ahem.





Leave a comment